Monday, November 27, 2017

Ornaments from Ouida

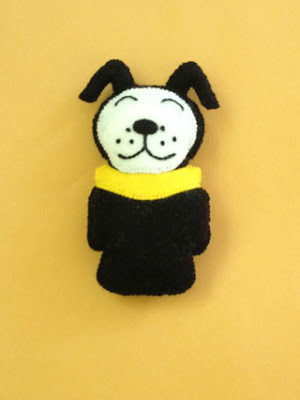
I'm not the only one who's been busy stitching.  Ouida sent me pics of some ornaments she's made and they're beautiful  I wish you could see hers up close because you would die of envy if you could see the precision of her stitches.  I love when other people make patterns that I designed.  Here's Ouida's take on my Fisher Price Little People. I'm actually working on a set of these for myself as we speak.   


She also worked up some classic DeAngelis patterns.


Here's Kola Koala.  This one turned out great! 


Betsy Bubbles 


Della from Delft 


This is NOT a DeAngelis, but I'm pretty sure I have this pattern, too.
Janet -- is this one of yours??


Missy Goose

I've been wanting to do this one for for a while.  I figured it would be a good place to start with some of the nursery rhyme ornaments.  This one was really fun and even though it had a ton of pieces, it went together quicker than I thought.  (I won't lie, though . . . I was decompressing the day after Thanksgiving and spent several hours stitching while binge-watching old episodes of ER.)

This one is fun because there's so much you can do in terms of color.  Black boots vs. brown . . . gray hair to look like an old woman . . . bright colors or pastels.

The only change I made was to add spats to both boots because it's my understanding that spats go around the whole boot and would be seen on the inside of the back foot.  (Do you like how I sound all official and artisty like I know one darn thing about perspective???)  


I also enlarged the pattern a little.  As it fits on an 8.5 x 11 sheet of paper, I thought she was a little on the small side . . . especially in terms of handling all the detail.  I enlarged her to 115% and used two sheets and she turned out the same size as most of my other ornaments. 


Here's another helpful hint for you.  I didn't have the exact shade of green thread in my ornament box and I just couldn't tear myself away from Dr. Lewis and the rest of the staff at County General to go down to my sewing room in search of some.  The thread I used was a little darker and, as you can see, you can really see those stitches.  I don't think it looks bad, but it ups the ante in terms of being pretty precise with stitch uniformity because it's not very forgiving!   

Richmond

I make mice ornaments each year for Allyson and my mom.  I don't always do it this way, but this year I did a double.  Here's the thing about doing doubles . . . . it seems like such a good idea in terms of efficiency.  If you have a short attention span like me, though, this gets maddening quick.  The cutting-out phase goes well.  That's my least favorite part of the process and doing two at the same time always makes me feel like I've really accomplished something.  (It doesn't take much.)  Then I start stitching them side-by-side.  Head on this one . . . head on that one . . . ears on this one . . . ears on that one . . . you get the picture.  About halfway through, I get impatient and completely finish one and then go back and completely finish the other one.  Every time.  I'm nothing if not predictable.

This was another one of Carolyn DeAngelis' bear patterns that I put a mouse head on.  It turned out really cute.  I gave my mother hers at Thanksgiving and she loved it!


Star Bright

This is Audrey's 9th angel ornament.  I have to keep a photo folder going just for hers so I can remember what I've already made.  This is Carolyn DeAngelis' Star Bright pattern.  If I had to do it over again, I'd enlarge it just a little as it's sort of on the small side.  Still cute, though!


Cinderella

I promised my friend, Naomi, a Disney princess/girl each year for her daughter, Penny Jean.  The year she was born, she received Snow White.  Last year I made her Tinkerbell, a pattern I originally designed for Mariah.  This year, I decided to do Cinderella.  This seemed like something that would be easily adaptable from an existing pattern, so I looked at some pictures online after a quick Google search and that helped me with colors and dress details.  


Cinderella's hair immediately made me think of the DeAngelis ballerina pattern called Tip Toe.  And that was my jumping off point.  


All I did was add a skirt and shoes, change the neckline, and draw the shoulder poufs, gloves, choker, and peplum and we were good to go!  


You really can't see it in the photo, but I used glitter felt for all the white pieces to give it a little sparkle.  She was pretty quick and easy and turned out great.  Since I was able to adapt an existing DeAngelis pattern, I'm happy to share this one with you:  


Sunday, November 26, 2017

Pierre

Alex, my oldest nephew, is a sophomore at Ohio University.  I made him an ornament of his school mascot last year.  And now that I type that, I realize that I neither posted it . . . nor took a picture of it.  I'll have to have my sister take a pic and send it to me.  Anyway, since I already made that, it was hard to decide what to do for him this year.  He did a study-abroad trip to France in May and he nearly got a French poodle before I came up with the idea to just do a French guy.  I Googled "French boy cartoon" or something like that and came up with some generic ideas.  Then I took the general features from the DeAngelis Solo Sam and stole the beret from  Marching Brayden.  I added a French flag and . . . PIERRE WAS BORN! 


I did have to stitch to separate the arms because of the stripes and those stripes are individually stitched on.  No fun, I tell you.  But he turned out great and I think Alex will love him.  Because I adapted a DeAngelis pattern, I'm happy to share this one with you.  Make it fit an 8.5 x 11 sheet of paper and you'll be all set. 


Peggy

Like half the pool-owners in the United States, we acquired this giant pegasus float this summer courtesy of Mariah.  She promptly named her Peggy.  


I'm telling you, this float really made the rounds.  Peggy was hard at work saving lives in Texas following Hurricane Harvey.  


I really like ornaments that mark a specific memory or moment in time, so I just had to make this one a reality.  Since I can't draw, it was time to adapt.  This one was a cinch.  I headed straight for Carolyn DeAngelis' carousel horse, Dobin-Go-Round.  


I ditched the pole, bridle, and saddle and made stripes on the mane and tail.  Looking at the pattern, I did manage to freehand a wing.  I added some silver star sequins for some bling and made the facial features match the photo.  Everyone who sees this ornament says, "Oh -- a unicorn!"  There's just one problem . . . . no horn.  C'mon, people.  But you could easily add a horn and have yourself a fancy unicorn!


Since I adapted this from a DeAngelis pattern, I'm happy to share it with you.  As always -- just make it fit an 8.5 x 11 sheet of paper and you're good to go!


Different Color -- Different Look

I did a couple of duplicates this year and I did the colors differently.  Thought you might like to see how changing the colors can change the look of the ornament.  I first made Wild Willy years ago and gave him an all-denim look.  This year, I changed his clothes up a little.  This is still one of my favorite DeAngelis patterns, though I think that cowboy hat could use a little tweaking.  Maybe the third time will be a charm!  You can also see the different of adding a nose.  


My youngest nephew began vocational school this fall in a fire-fighting program.  Fire Chief Freddy seemed an obvious choice for his ornament!  I wanted him to match Zach's uniform -- which is the tan version -- so I used those colors.  (I have no idea if Zach's helmet is red.  It probably isn't.  That was my festive choice.)  When I first posted this ornament, I remarked that I thought he needed some sort of accessory and contemplated stitching an axe.  Then I saw the version made by a faithful reader, Janet, and she had brilliantly used a piece of shoelace as a hose.  Perfect!


Thursday, July 6, 2017

Emojis

I departed from my ornament schedule and whipped up a couple of quick ones for my kids over the weekend.  As teenagers, they communicate primarily through text and they are quite fond of emojis.  I've noticed two, in particular, that I receive on a regular basis:  the laughing-with-tears face and the poop.  Very nice.  The laughing-with-tears seems to be their response to everything.  If you judged this family solely by their texts, you'd think we live in a constant state of hilarity.  I'm funny, but I can assure you that no one is sitting around this house crying in hysteria.  

I did a quick Google search for the emojis and whipped up a pattern.  I'm including the patterns here and you can stitch them to your heart's content!  They're very quick and would make a great gift.  The tears on the laughing face are stitched separately and then glued on.  Same thing for the eyes and mouth on the poop.  I must confess, looking at that poop makes me want to stitch a soft-serve ice cream cone with a cute face!


Downeast Thunder Farm Birds

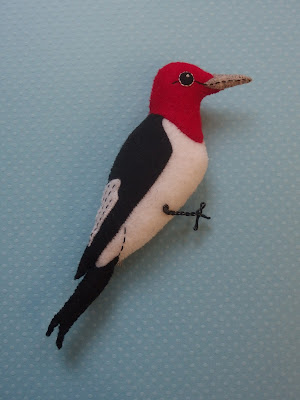
On Pinterest, I found a wonderful site called Downeast Thunder Farms.  She offers beautiful patterns of all your favorite birds and wildlife and they are TOTALLY FREE!!! They are nicely done with color photos and you can just print them right out.  Cool, right??  My husband loves the birdfeeder outside his office window, so I wanted to make him some birds.  They were pretty quick and I love the detailed stitching you can add.  Get yourself right over to that site and download some patterns!  I'm placing the direct link to the specific patterns under each picture.  


Sea Legs Stout

I've been a little quiet lately, but I've been here stitching!  I've done several that I've done before and I didn't think you needed to see a third mermaid that looks exactly like the others I've done.  I made the mermaid for our oldest, Caleb, who was the musical director for his district's version of "The Little Mermaid" back in the winter. Caleb also requested a pirate, so it was back to the drawing board for that one.  How is it that Carolyn DeAngelis never got around to designing one of those??

Of course, I headed straight to Etsy where I found this clipart from a site called Cutesiness.  I had asked Caleb to pick two features so as not to over-accessorize our pirate friend. His choices were:  eye patch, hook hand, peg leg, parrot, earring, and facial hair.  He chose eye patch, peg leg, and parrot.  This one turned out GREAT and I'm such a fan of that parrot that I may have to turn that into its own ornament!  See what you think . . . 


The hat has a strip of gold across the top.  You couldn't see it in the first photo.  Might have to make that a bit wider the next time.  


DISCLAIMERS:

In case anyone happens by and thinks I've stolen someone else's work or thinks I'm profiting from it:


  • purchased the clip-art.  I did not do a "right click/save as."
  • I am not selling a pattern made from this clip-art.  I'm not even giving away a pattern made from this clip-art.  
  • I am not selling ornaments made from this clip-art.  


Wednesday, April 5, 2017

Marching Brayden

If you remember, last month I posted the Marching Mariah ornament.  Time for Marching Brayden!  Here's a picture of the kids so you can refresh your memory.


Brayden plays snare drum and the percussion uniforms are quite different from the rest of the band.  I was able to use the same basic body type from Mariah's ornament and just make some basic changes to the uniform and the arm positions.  (Yes -- you can have this pattern.)


I thought toothpicks would be a little too small scale-wise, so I bought the tiniest dowel rod I could find in the Walmart craft department.  The drummers wrap their sticks with colored electrical tape and everyone chooses their own design.  I had Brayden draw me a picture of what his look like so I could duplicate them.  He turned out great!


I didn't bother stitching the "WH" on the chest because I knew the snare drum harness would cover it up.  I was worried about the beret looking like a blob, but I think it looks okay.  I was also concerned as I was stitching that Brayden's ornament was bigger than Mariah's, but once I got them done I could see that it was perfect.   


I can't wait to see these on the tree this year.  I know if I post a picture of these on Facebook, I'll be hit with a million requests for orders.  My answer will be, as always, "You can't afford it!"

Skating Brayden

Since he was along on the trip to Cleveland for everyone's first ice skating experience, Brayden needed an ornament, too.


(Concentration requires his tongue to be out.  I should've put that on the ornament!)

If you recall, I made Skating Mariah last month.  Back to Etsy to look for a suitable boy. Something about this set of clipart caught my eye.  I think it was the hat.  

I had that moment where I asked for an opinion when what I really wanted was approval of a decision I'd already made.  "I was thinking about a red hat," I said.  "No.  Camo." was the response.  CAMO.  I actually did have some camo felt, so I could deal with that.  "And a black coat. Because my coat is black."  A black coat.  BLACK.  That's not festive.  I put my foot down on that one.  I reminded him that his other coat is tan and he relented.  And I made a decision not to ask him for any more opinions.  First, the Playstation logo and now, the black coat.  You, sir, are done having input!

This one turned out GREAT.  I love the body position and that hat.  When he's hanging, he'll actually be tipped back a little -- like the clipart picture.  He'll look great on the tree this year!


DISCLAIMERS:

In case anyone happens by and thinks I've stolen someone else's work or thinks I'm profiting from it:


  • purchased the clip-art.  I did not do a "right click/save as."
  • I am not selling a pattern made from this clip-art.  I'm not even giving away a pattern made from this clip-art.  
  • I am not selling ornaments made from this clip-art.  

Tuesday, April 4, 2017

Donatello

Brayden's second request was more reasonable, fun, and challenging.  He wanted a Ninja Turtle.  The purple one, to be exact, whose name is Donatello.  Off to Etsy for some clipart!  There were lots of options, but this one seemed to be the best fit for my purposes.  Since Brayden is older, I wanted the least cartoonish thing I could find.  This had a LOT of pieces . . . about 40, to be exact.  It was worth it, though, because he turned out great!


The clipart picture made it look like something was wrapped around the middle of the stick, so I used some skinny hemp cord I had.  I don't usually do much on the back of an ornament other than stitch the date.  Even though no one will see it, I felt compelled to do something fancy with the design of the shell.


Brayden was so happy with it that I feel sure I'll be stitching the other three turtles in the coming years!


DISCLAIMERS:

In case anyone happens by and thinks I've stolen someone else's work or thinks I'm profiting from it:


  • purchased the clip-art.  I did not do a "right click/save as."
  • I am not selling a pattern made from this clip-art.  I'm not even giving away a pattern made from this clip-art.  
  • I am not selling ornaments made from this clip-art.  

Playstation Playtime

March was the month for Brayden's ornaments.  He's surprisingly enthusiastic about them given that he's a 15 year-old boy.  I asked him if he had any special requests.  He loves to play video games, so I suggested a boy playing one.  Nope.  He wanted the Playstation logo.  


I'll give you a minute.


That's right . . . THE PLAYSTATION LOGO.  That symbol on a black background.  Nothing I said could convince him that would be a pretty stupid ornament.  The Playstation logo on a black background.  That was his first request.  So, with out further ado . . . . here it is:


Is that the dumbest thing you've ever seen, or what??  If it makes you feel any better, he was thrilled with it.  (That's okay . . . it doesn't make me feel any better, either.)


Wednesday, March 8, 2017

Marching Mariah

Both kids are in marching band and I knew I definitely wanted to do ornaments of them in their uniforms.  This one took some thought and it took a while to design.  This is an old picture of them from freshman year with their band friend in the middle.  I wanted to include as much detail as possible without losing my mind.  


Because I can't draw, I started by looking for a DeAngelis pattern that had the basic body shape I wanted.  I was looking for a front-facing girl with her arms positioned to hold something.  I landed on Jodi.


Using the method I shared on how I do my pattern designing, I got to work tracing and changing details.  Here's the first pattern I came up with:


I don't usually color them, but I needed that for reference when I started cutting out.  I got it all cut out and even got the front of the jacket stitched . . . . and then I decided I didn't like it.  For starters, I made a mistake that I've made before and I don't know why I didn't catch it.  I like my ornament people to be about 5-1/2" tall when they're completed.  When I printed this pattern, I made it measure 5-1/2" from the top of the HAT to the bottom of the feet.  What I really meant to do was make it measure 5-1/2" from the top of the HEAD to the bottom of the feet.  Secondly, I didn't love the hair.  I also had the head disproportionately large.  And, finally, I didn't like the legs.  I knew this one would be a lot of work and be hanging on my own tree, so I didn't want to be looking at it and hating it every day.  (I already have that Charlie Brown situation -- remember?)

So . . . . back to the drawing board!  I like my second attempt much better.  The hair's a little different, I got it the right size, I changed the pants, and I got the head in proportion with the rest of the body.


(Yes --  you can have that pattern.)

Since I can't draw, I had to figure out what to do about that trumpet.  I just did a Google search for "black and white trumpet clipart" and came across this:


I sort of drew around the outside and then drew around the inside.
Worked like a charm.  Mariah loves her!!


Skating Mariah

Neither of the kids had been ice skating before.  We promised them a "friend day" over Christmas break and one of the things we did was go ice skating outside in downtown Cleveland.  It was a beautiful day and everyone had a great time.  


I could've just used Carolyn DeAngelis' Katrina pattern . . .


. . . but I knew I'd probably want to do a matching boy for Brayden, so I wanted to go a different route.  I'd seen some cute ice skating clipart on Etsy and decided this would be an easy one to design. I've noticed that very often on Etsy, the clipart vendors will have a "buy two, get one free" offer.  I've even seen "buy two, get get TWO free" before. That's a good time to peruse everything in that Etsy store to see if there's anything you can use down the road.  This clipart came from an Etsy store called Tiny Confetti  and it was perfect for adapting to an ornament because it was simple.  


I wanted to use paper clips for the skate blades like I did on the Katrina ornament.  This one had smaller feet, though, so the whole paper clip would've been too big.  If you look at a standard paper clip, there's that smaller, inside loop:


I used wire cutters to just snip off the larger loop and that worked perfectly.  The overlap of the of the paper clip is hidden up inside the skate.  I think she's adorable . . . just like the girl she's named for.  

DISCLAIMERS:

In case anyone happens by and thinks I've stolen someone else's work or thinks I'm profiting from it:


  • purchased the clip-art.  I did not do a "right click/save as."
  • I am not selling a pattern made from this clip-art.  I'm not even giving away a pattern made from this clip-art.  
  • I am not selling ornaments made from this clip-art.