
Even with several hundred patterns, sometimes I just don't have what I want for a specific person. That's the case with Naomi this year. Her first ornament was the nurse that I did when she finished college. She became a labor & delivery nurse, so her second ornament was the Blessed Event stork that added a baby to. Last year, she received my personalized version of Blushing Belinda to commemorate her wedding. This year, having already covered major events and careers, I was at a loss. And then I thought of Tucker.

Tucker is Naomi's and Dave's new and much beloved King Charles Cavalier Spaniel puppy. I thought she'd like an ornament that looked like him . . . . and I thought YOU might like to see how I go about creating an ornament from scratch.
I've said many times that I can't draw. Not even a little bit. But I'm a pretty good copier. The first thing I do is go to Google and do an image search. In this case, I searched for "cavalier spaniel clipart." I always add "clipart" to my search to eliminate all the photos. I wound up with this.

Things like this are too realistic for my meager artistic skills to adapt.

This is a little too cartoon-ish and not what I want.

This is perfect!

I imported that into my Print Shop program. It has visible rulers, so I'm able to scale it to the size I want.

From there, I adjust the tint scale to about 30% to lighten it to where it's faint, but I can still see it well enough to make out the features.

Then I print a copy.

Next, I use a fine point Sharpie or other felt-tip pen that will bleed and I trace right on the printout the paper of what I want the finished ornament to look like. I leave out tiny details and things I plan to omit, like the shagginess of the fur, the package, or the little tongue.

Then I flip the page over and I can see where the ink has bled through.

I trace right over the lines I drew from the other side so I have a nice outline to work with.

(Because I'm a little OCD, I scanned it and reprinted it so it was facing to the right like the original drawing.)
I start thinking about how the pieces need to be designed so that things can be tucked under and inside other things . . . . like the tail or the front paw. I draw little dashed lines to indicate how I need those pieces to be cut.

Once I do that, I re-scan it . . . put it back into Print Shop . . . make sure it's the size I want . . . arrange it in one of the upper corners of the page . . . and print TWO copies. I tape one copy to my tracing surface.
In this picture, I'm using an acrylic table that attaches to my sewing machine and I put a light under it. That's because I was working at night. In the day, I'm too lazy to drag all that out, so I just tape it to a window.

I lay the second copy over the top and start tracing the individual pieces at the bottom.

Here's what it looks like when I'm finished. The sheet on the right is the one taped to the tracing surface. The sheet on the left is the one I traced on.

At this point, I scan the page again. I do this for a couple of reasons. 1) I like to have a copy saved to my computer.

2) I like to put it back into Print Shop and add labels to the pieces.
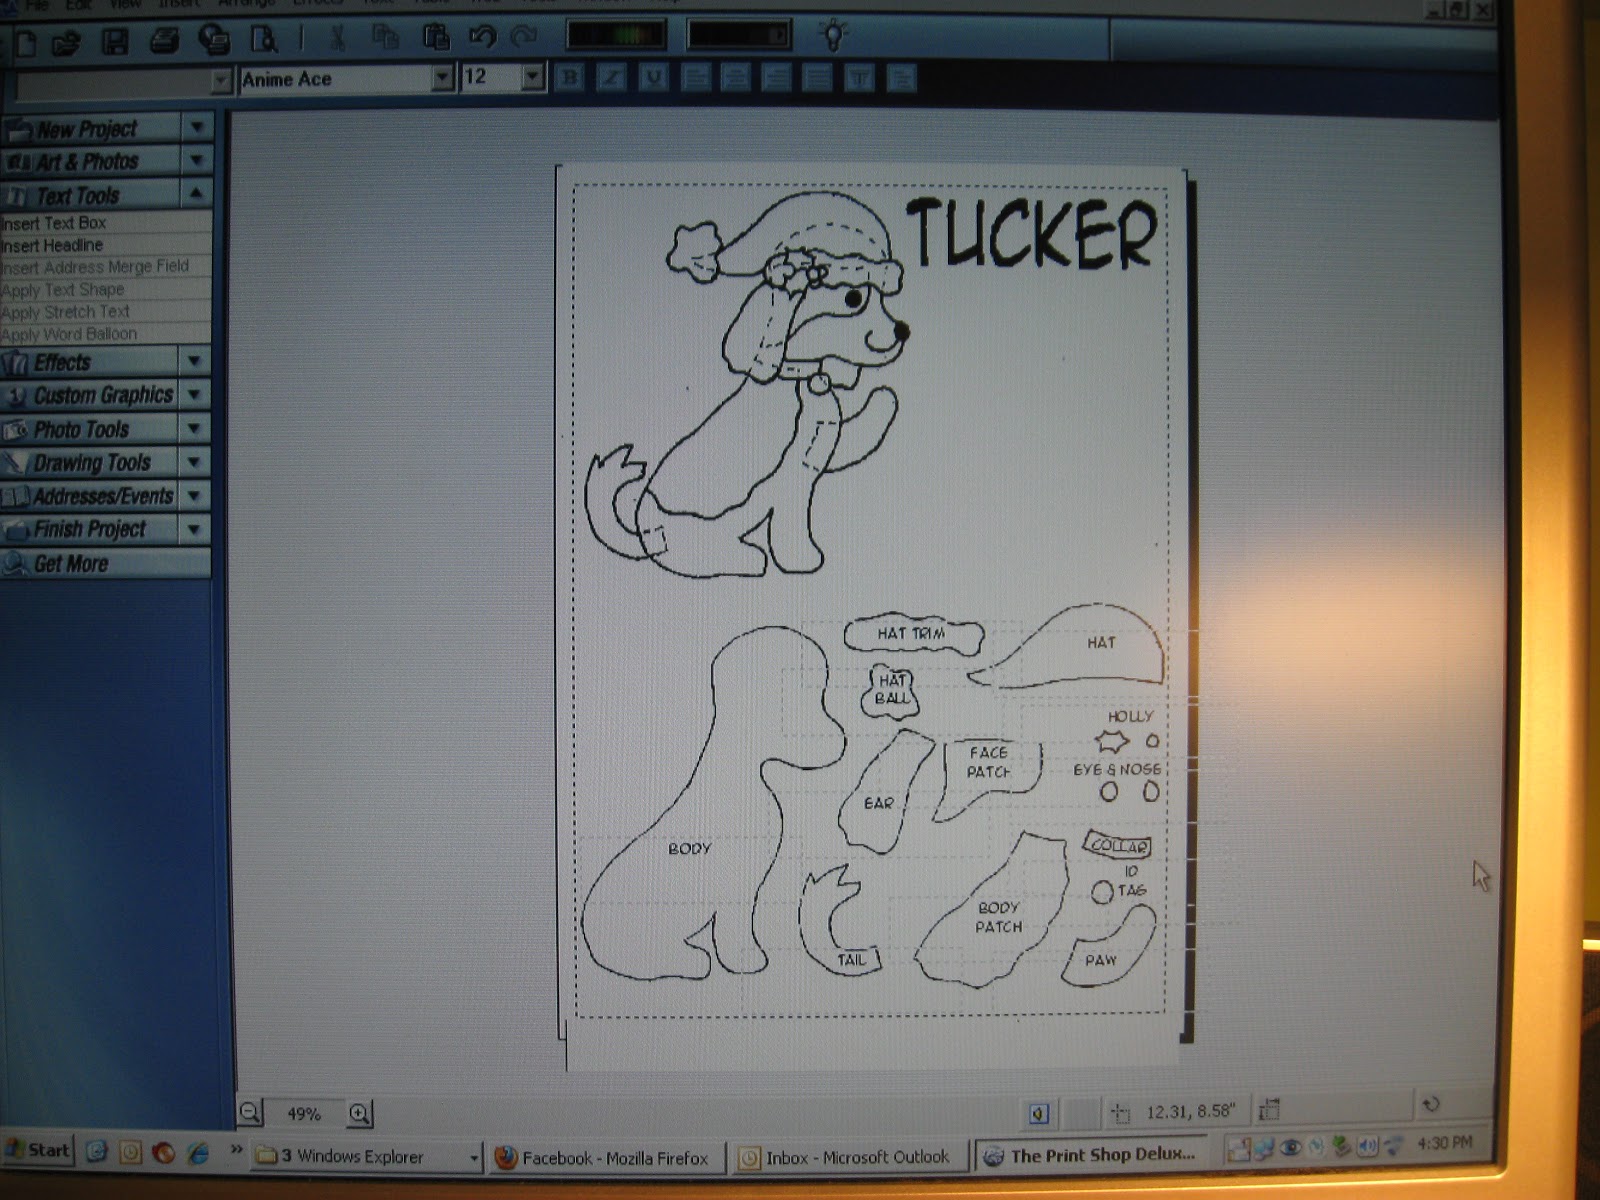
So here's what I wind up with:

And that is how I go from this:
To this!

That is a great tutorial on how to create your own pattern. Tucker is adorable! Did you purchase your print shop program? Any recommendations as I've never used one before.
ReplyDelete