Thursday, February 9, 2017

Matilda

I had always wanted to do a Raggedy Ann doll ornament.  I had a set of cloth Raggedy Ann & Andy dolls when I was young; I think they were standard issue in the 70's.  I also have fond memories of the handmade Halloween costumes my mother made us one Halloween.  


That's me on the left, my cousin in the middle in the homemade clown suit with fabric that had Rice-A-Roni on it (???), and my sister on the right.  We will be 50, 43, and 47 this year.  Please take a moment to appreciate the custom slipcovers on that couch, will you?

Anyway . . . my choices for DeAngelis patterns were Matilda . . .


. . . or Raggy Maggie.


I didn't love either one.  Matilda's face wasn't right and Raggy Maggie was too simple for my taste.  I did a little digging online for some photos so I could add some details.  I decided if I changed the face on Matilda and added stripes to the stockings, that would do the trick.  I had intended to do some little polka dots or something on the dress, but once I got all the pieces done I decided it didn't need it.  Here's my finished product . . . let's call her Raggedy Matilda, shall we??


I fully intended to do a Raggedy Andy, but January ran out on me.  February is ornaments for Mariah.  If I get time later in the year, I'll swing back around and stitch Matilda a friend.  

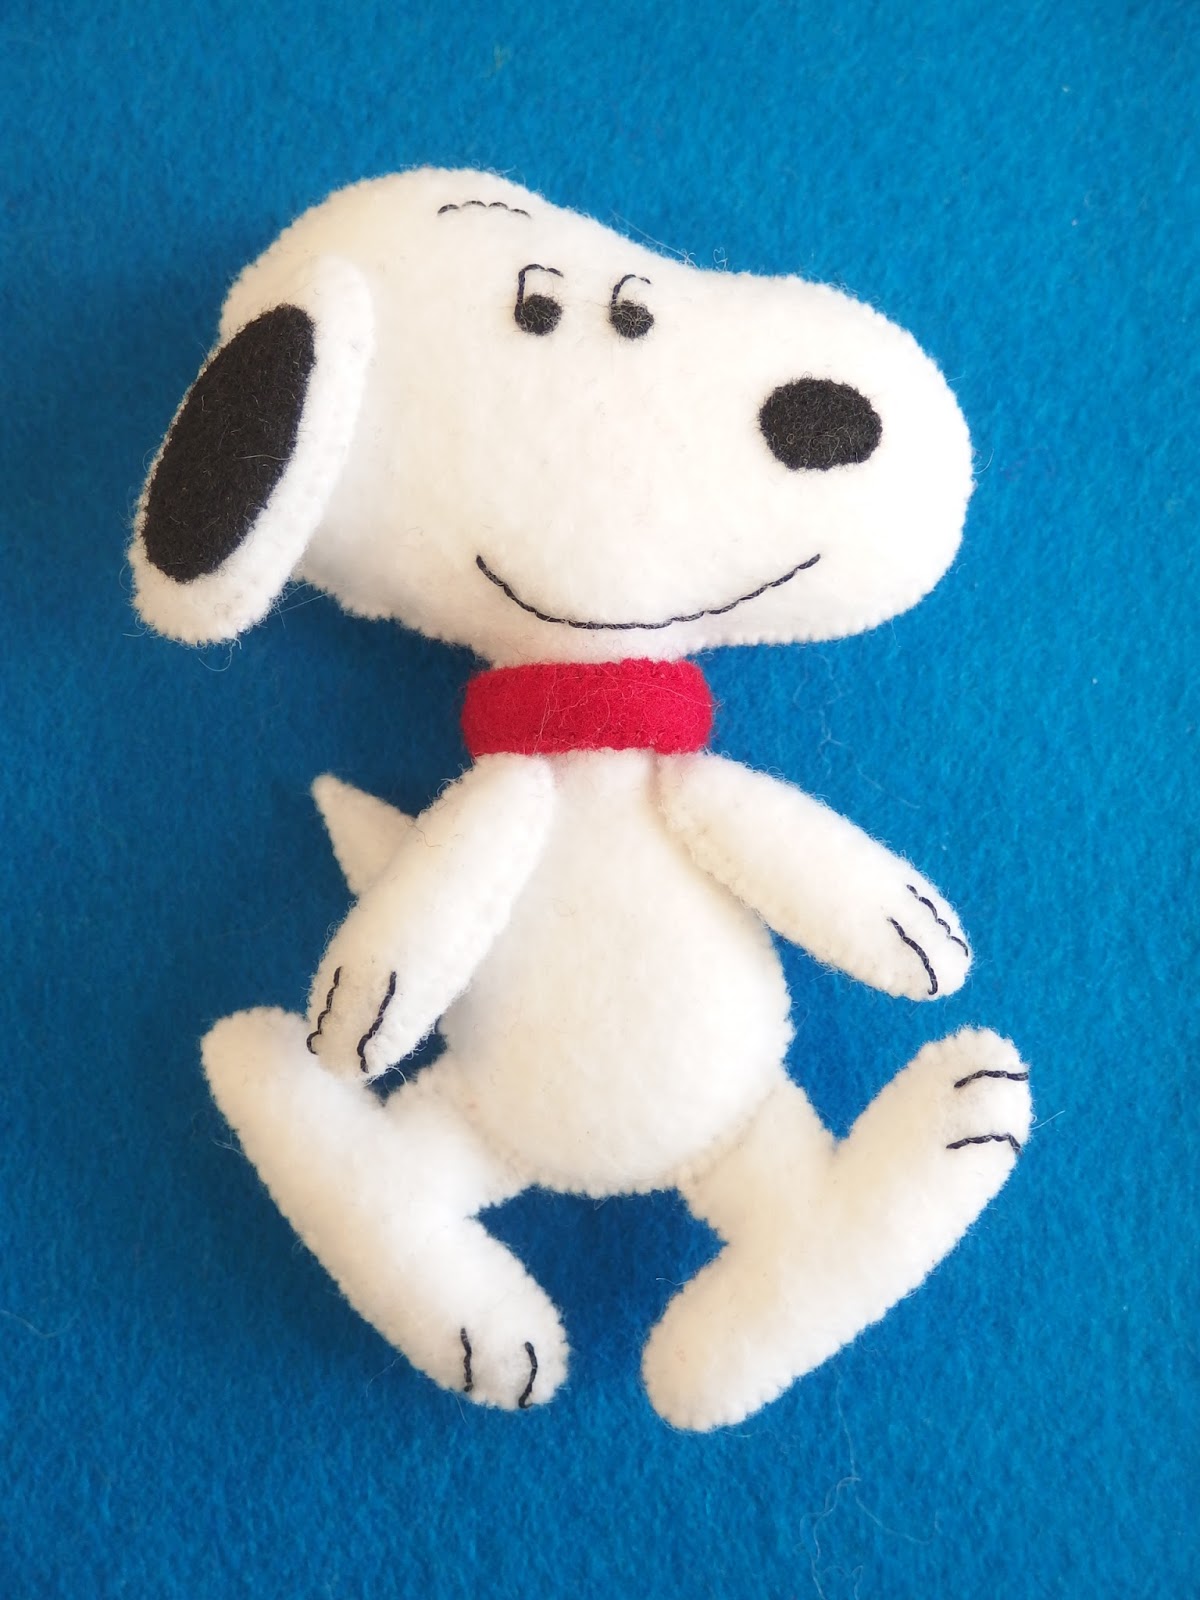
Charlie Brown & Snoopy -- Patterns from Etsy

This is another one I'd saved on Pinterest.  How cute are these?  As a child of the 70's who grew up on the Charlie Brown cartoon specials, I had to make these.  Straight to Etsy for the pattern from a Brazilian designer.  It's interesting . . . a lot of the really cool things I pin lead to blogs that are from Brazil.  That must be the felt crafting capital of the world.  The pattern is a bargain at $18.90 because it includes pieces for all these ornaments you see here.  I thought I'd do two a year.  If you look in her Etsy shop, she has a couple more Peanuts characters you can buy if you finish all 10 of these and are still in the mood.  The only downside is that it's pieces only:  no real diagrams or instructions.  There are color photos, though.  If you'd like to order this pattern, click here


Now . . . my Snoopy turned out great.


My Charlie Brown, on the other hand . . . . not so much.


Oh, my.  Everything about him is bad.  I feel angry every time I look at this ornament.  I mean, I'm probably over-thinking it.  It's a Christmas ornament, for crying out loud.  And you CAN tell it's Charlie Brown.  Seriously, though . . . I'm embarrassed by him.  There's too much leg showing.  I don't really know what's griping me about the arms because they look like they do in the photo.  And that FACE!  The horror.  Somehow the proportion is wrong.  The eyes are too high.  Something.  I'm honestly toying with taking the whole head off and starting again.  It's a good lesson in how a few tiny things can really throw things off.  I've decided to not look at him again until later this year and then see if I feel like I need to redo that head.  Sorry, Charlie!

PLEASE NOTE:  I have never personally communicated with the pattern designer other than to order the pattern.  I didn't receive a free pattern for this post and I'm sure she doesn't even know this blog exists.  I just saw these photos on Pinterest and followed the link.  

Xmas Little People -- Patterns from Etsy

If you are a Pinterest hound like me, you probably have a board set up for felt ornaments. There are oodles of beautiful ornaments from all over the world.  Many of them lead to links on Etsy where the patterns are available.  That's how I stumbled across these adorable folks:


The great thing about patterns on Etsy is that they're available for immediate download.  Just a few clicks and you can be printing out a pattern and getting ready to stitch.  No more pesky postage fees or hanging around the mailbox in anticipation.  The pattern is available from an Etsy shop called Hello Felt.  You can order these little guys individually, or get them cheaper by ordering all three patterns in a set which is what I did.  The patterns were FANTASTIC.  Very clear instructions, beautiful photos, and even suggestions for different ways to accessorize the ornaments.  I will most definitely be purchasing patterns from this shop again.  If you want to purchase this pattern, click here to go to the Etsy shop.  

Honestly, these are maybe my favorite ornaments ever.  Look at that snowman . . . . how cute is he?


PLEASE NOTE:  I have never personally communicated with the pattern designer other than to order the pattern.  I didn't receive a free pattern for this post and I'm sure she doesn't even know this blog exists.  I just saw these photos on Pinterest and followed the link.  

Little Bo Peep

I realized as I was decorating my Christmas trees that I hadn't made a single ornament for myself last year.  I made several for the kids so there were new ornaments on the tree, but none of them were for me personally.  I did everyone else's ornaments first and then ran out of time to make myself some.  This will not do!  I decided to take the month of January and make ornaments just for me.

First up -- Little Bo Peep.  My sister and I had Madame Alexander dolls when we were little and she had Little Bo Peep.  Any time I looked at the DeAngelis pattern, I pictured that doll in my head.  She looked like this:


That's all I could visualize in terms of color choices for the ornament.  I made some modifications to the pattern to add the vest and the petticoat.  She turned out great and is a nice reminder of our childhood doll collections.  


Monday, December 19, 2016

Leo

This is another one of those patterns that's a little deceiving.  It is SUPER unappealing on paper.  I wanted to do a lion, the Alpha Delta Pi mascot, for Kelly's ornament this year.  Every time I went to cut out a new ornament, I'd look at this pattern and think, "Yuck.  I'll design something better than that."  Push came to shove time-wise and there just wasn't time to design something from scratch.  I decided to do my best to make this one look presentable.  

Here's the picture from the original pattern:

See what I mean?  Snoozefest.  The more I looked at it, the more I realized that what was bugging me was that the mane and body were one piece.  That just didn't even make sense to me.  I figured if I could make them separate pieces, that would probably help in terms of color.  Here is the Alpha Delta Pi lion logo:


I looked at several images and they were all the same: two-tone lions in light blue and a darker blue.  Easy peasy.  A simple drawn line, an additional piece and abra cadabra:


Doesn't he look great?  And don't let that stitching scare you away.  I was too lazy to walk downstairs to get embroidery floss, so that's just two strands of plain old thread.  He went together pretty quickly, so if you're in a pinch, stitch up this one!  I can't wait to give him to Kelly . . . she'll love him!

Beary Christmas Special . . . With a Twist

As you know, I make a different mouse for my mom every year.  I did this year what I did last year: modified a bear pattern.  This is actually one of the Beary Christmas Special patterns.  I borrowed a mouse head and tail from one of the mice patterns and it worked great!  The candy cane is super cute and this one looks great on the tree. 


Here is a REALLY lousy shot of my mom's Christmas tree with all her mouse ornaments.  She sent this photo in an email in such a way that I could not figure out how to download it or save it.  I finally gave up and just took a picture of my computer screen!


Monday, November 21, 2016

Snorkeling Brayden

We took a family vacation to Mexico in June and it was Brayden's first experience with snorkeling.  I didn't think we'd ever get him out of the water.  This was my view of him for pretty much the entire trip.


I made the Snorkeling Mariah ornament after her first trip to Mexico, so I thought Brayden needed one, too.  I went to Etsy in search of clipart and found the boys' version of the art I'd used for Mariah.  Since I knew what I was doing this time, I took pictures of how I did the mask.  I used clear vinyl tablecloth covering.  This is much thinner and easier to stitch through than actual clear vinyl.  

First, you cut a piece of vinyl bigger than the mask.
Sandwich it between the two pieces of felt and pin it.  


Stitch around the inside of the mask, going through the felt and the vinyl.


Trim away the vinyl inside the mask with a tiny pair of scissors.


 Then you have this.


Now comes the fun part.
Start stitching and stick in the pipe cleaner.


Keep stitching and bending as you go.  


When you get to about here, you have to measure and cut.


Bend it around, stick it down in there, and finish it up!


It's really not as hard or time-consuming as it looks.  The first couple of stitches are the worst and then it's smooth sailing from there.  He turned out great and I'm anxious to see them hanging side-by-side on the tree!  


DISCLAIMERS:

In case anyone happens by and thinks I've stolen someone else's work or thinks I'm profiting from it:

  • purchased the clip-art.  I did not do a "right click/save as."
  • I am not selling a pattern made from this clip-art.  I'm not even giving away a pattern made from this clip-art.  
  • I am not selling ornaments made from this clip-art.